Landscape Lighting Design: How to Plan Your Outdoor Space
Landscape lighting design is the process of strategically planning and placing outdoor fixtures to enhance safety, aesthetics, and ambiance across your property. Done well, it transforms an ordinary yard into a composition of light and shadow that reads as intentional, polished, and deeply considered. This guide covers the full outdoor lighting design process: from dividing your yard into purposeful zones and selecting the right fixture types, to spacing strategies, transformer sizing, and the professional principles that separate a glare-free, atmospheric result from a haphazard collection of lights pointed at the ground. Whether you are working with path lights, uplights, or decorative fixtures, the method is the same.
How to design a landscape lighting plan: start with zones
The single most effective first step in any outdoor lighting planning guide is dividing your property into distinct zones before you select a single fixture. Assigning each zone a purpose — functional, accent, or atmospheric — clarifies every decision that follows, from fixture type to wiring layout. Without this step, most homeowners end up with undifferentiated lighting that illuminates everything equally and nothing memorably.
A practical zone breakdown for most residential properties looks like this:
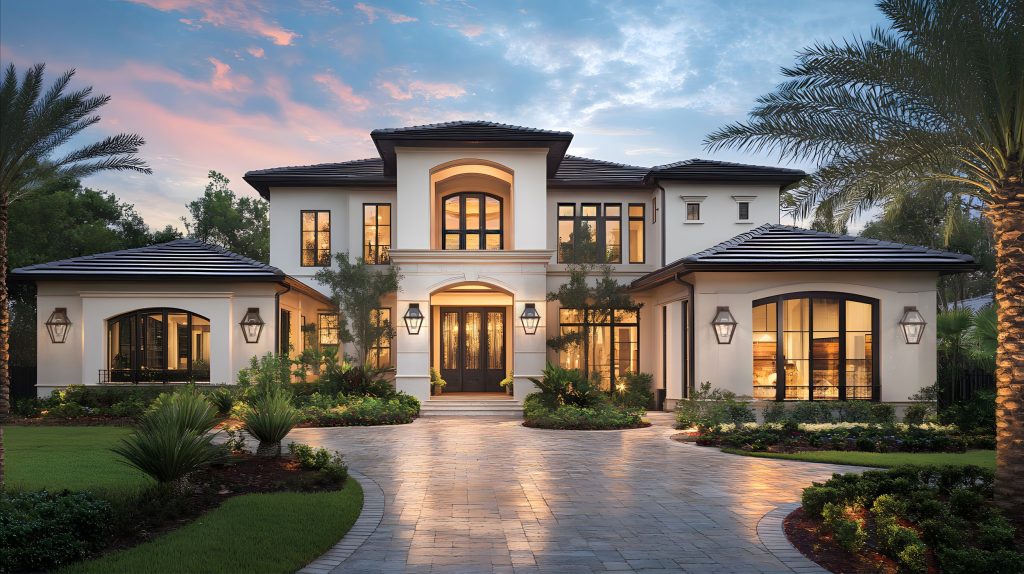
- Front yard and entry: Functional and curb-appeal lighting. Path lights, wall sconces, and uplights on architectural features serve this zone.
- Driveway and walkways: Safety-focused. Consistent, low-glare path lighting guides movement without blinding visitors.
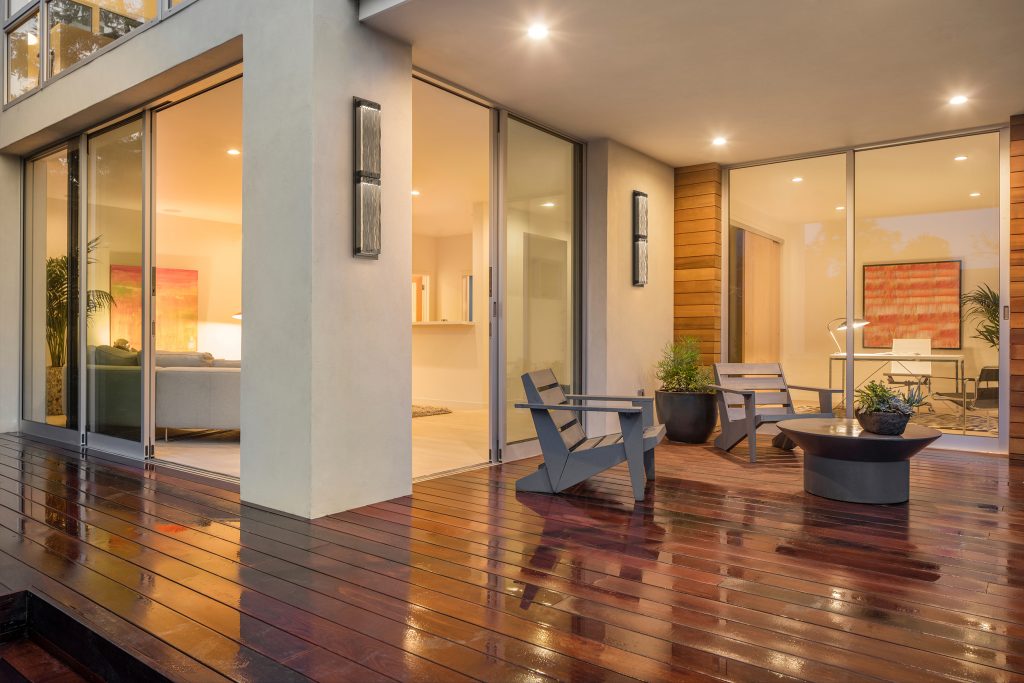
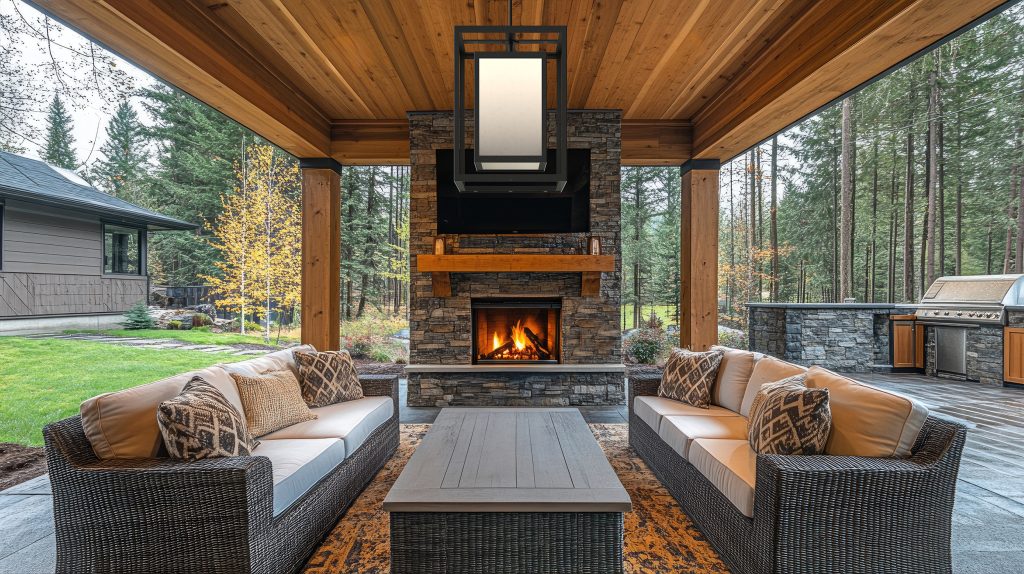
- Patio and outdoor living areas: Atmospheric. Softer, layered light creates comfort and encourages lingering.
- Garden beds and specimen trees: Accent-driven. Uplights and spotlights draw attention to focal points like a mature oak or a sculptural shrub.
- Perimeter and back fence lines: Security-oriented. Broader flood coverage deters intrusion without harsh brightness.
Once zones are mapped, wiring layout becomes logical rather than improvised. Fixtures serving the same zone can share a transformer circuit, which simplifies both installation and future adjustments.
Pro Tip: Sketch your zone map on a printed satellite image of your property before purchasing anything. Mark each zone’s purpose and note the distance from your planned transformer location. This single step prevents the most common DIY wiring mistakes.
What fixture types and beam angles should you use?

Fixture selection in professional outdoor landscape lighting design is driven by two variables: the target surface and the desired visual effect. Matching the right optic to each application is what separates a polished result from a washed-out one.
The most common fixture categories and their applications are summarized below:
| Fixture type | Beam angle | Best application |
|---|---|---|
| Spotlight | 10°–45° | Focused accent on trees, sculptures, architectural details |
| Floodlight | 60°–120° | Large walls, broad garden beds, wide driveways |
| Path light | Omnidirectional (shielded) | Walkways, borders, low planting beds |
| Deck/step light | Directional, low-output | Stair risers, deck edges, grade changes |
| Uplight (well light) | 30°–60° | In-ground accent for trees and columns |
Beam angle selection is the most overlooked variable in DIY outdoor lighting. A narrow 15-degree spot on a wide garden wall produces a harsh, theatrical circle of light. A 90-degree flood on a single ornamental tree washes out the form entirely. The goal is to match the optic to the target’s width and distance.
Color temperature matters as much as beam angle. Warm 2700K to 3000K LEDs render plant material, stone, and wood in their most natural, inviting tones. Cooler temperatures above 4000K produce a clinical, bluish cast that reads as institutional rather than residential. Warm LEDs also support Dark Sky compliance, which reduces skyglow and protects the circadian rhythms of both residents and local wildlife.
Pro Tip: Before committing to a fixture, hold a flashlight at the planned mounting position and aim it at the target surface at night. This low-tech test reveals beam spread, shadow behavior, and glare angles before you spend a dollar on hardware.
How should you space and place outdoor lights?
Placement precision is what gives a professionally designed system its rhythm and restraint. Path lights spaced 6 to 10 feet apart work well for most residential walkways, though some designers extend spacing to 20 feet or more when the goal is subtle guidance rather than continuous illumination. The “runway effect,” where lights march in two perfectly parallel rows at identical intervals, is the most common placement mistake homeowners make.
Follow this sequence for placement decisions:
- Identify focal points first. Place accent and uplights on your most compelling features: specimen trees, stone walls, water features, or architectural columns. These anchors define the visual hierarchy of the entire system.
- Place path lights second. Work outward from entry points. Stagger lights on alternating sides of the path rather than mirroring them directly across from each other. This creates a more natural, organic rhythm.
- Fill atmospheric zones last. Patio and garden bed lighting should complement the accents, not compete with them. Lower-output fixtures work best here.
- Test from multiple viewpoints. Walk the property at night with a flashlight simulating each fixture’s output. Check sightlines from seating areas, the street, and neighboring properties to identify glare angles before installation.
- Allow for darkness. Darker gaps between path lights are not failures. They create visual rhythm and prevent the harsh, over-lit look that makes residential lighting feel like a parking lot.
Glare control depends on optics and aiming, not simply on using lower-wattage bulbs. A well-aimed 5-watt LED with a proper shroud outperforms a 2-watt lamp pointed directly at a viewer’s eye. Shielded fixtures with full-cutoff optics keep the light source invisible from normal viewing angles, which is the defining characteristic of sophisticated outdoor illumination.
Pro Tip: After placing fixtures temporarily, live with the layout for one or two nights before burying wire. What looks balanced in a plan often needs adjustment once you see it operating in real conditions.
How do low-voltage wiring and transformer sizing work?
Low-voltage systems operating at 12 volts are the standard for residential landscape lighting, offering safety, energy efficiency, and DIY-friendly installation compared to line-voltage alternatives. The transformer is the heart of the system, and sizing it correctly requires one straightforward calculation: add the total wattage of all fixtures on a circuit, then multiply by 1.2 to build in a 20% operating buffer. Round up to the nearest standard transformer capacity, typically 150W, 300W, or 600W.
Key wiring considerations that determine system reliability:
- Wire gauge: Use 12-gauge wire for runs longer than 100 feet and 10-gauge for runs approaching 200 feet. Undersized wire is the leading cause of fixture dimming on long circuits.
- Burial depth: Low-voltage cable should be buried at least 6 inches deep in garden beds and 12 inches under lawn areas to protect against accidental damage.
- Zone grouping: Connect fixtures in the same zone to the same transformer circuit. This simplifies troubleshooting and allows zone-by-zone timer control.
- Multi-tap transformers: These allow voltage adjustment at the transformer rather than rewiring, which is particularly useful for correcting brightness inconsistencies across long runs.
Voltage drop is the most common technical failure in DIY low-voltage systems. In a 12V system, fixtures at the far end of a long run may receive only 10.5V, producing noticeably dimmer output. The minimum safe delivery voltage for most LED landscape fixtures is 10.8V. Fixes include upgrading wire gauge, shortening individual runs by creating a hub-and-spoke layout from the transformer, or using a multi-tap transformer to boost voltage on affected circuits.
Proper transformer placement and zone grouping are decisions that must be made during the planning phase, not after installation. Retrofitting a poorly planned wiring layout is significantly more disruptive than getting it right on paper first.
Pro Tip: Mount your transformer near an outdoor GFCI outlet and position it centrally relative to your lighting zones. A central location minimizes the total wire run to each zone, which is the single most effective way to reduce voltage drop across the entire system.
What professional principles create beautiful outdoor lighting?

The most sophisticated outdoor landscape lighting ideas share a common philosophy: they reveal rather than flood. The “reveal, don’t flood” principle means using light to emphasize the form, texture, and depth of surfaces rather than simply making them bright. A stone wall grazed by a low-angle uplight reads as richly textured and three-dimensional. The same wall hit with a broad flood from directly in front reads as flat and overexposed.
Professional designers layer three types of light to create depth and visual interest:
- Ambient light provides the base level of illumination for safety and general orientation. Path lights and low-output area fixtures serve this role.
- Task light addresses specific functional needs: entry lighting bright enough to read house numbers, step lights that clearly define grade changes, driveway lighting that supports safe vehicle movement.
- Accent light creates the drama. Uplights on specimen trees, spotlights on architectural details, and grazing light on textured surfaces all fall into this category. Accent lighting should represent the smallest quantity of fixtures but deliver the greatest visual impact.
Dark Sky compliance is no longer a niche concern. Full-cutoff fixtures that direct light downward, warm color temperatures in the 2700K to 3000K range, and motion-activated or timer-controlled systems all reduce light pollution while improving the quality of the lighting itself. A Dark Sky-certified fixture keeps the light source hidden from view, which eliminates glare and makes the illuminated surface the visual subject rather than the fixture itself.
designing outdoor lighting that endures
The most persistent mistake we see in residential outdoor lighting is the impulse to light everything at once. Homeowners install a full system in a single weekend, and the result is a yard that glows uniformly from every direction, with no shadow, no depth, and no sense of hierarchy. The yard is visible, but it is not beautiful.
The designers and craftspeople at Hammerton have spent decades working with architects and landscape professionals on projects where restraint is as deliberate as selection. What we have learned is that starting with fewer fixtures and living with the result for several weeks produces far better outcomes than a comprehensive installation completed in a single session. You discover which trees deserve a spotlight, which path sections need more guidance, and which areas are already served by ambient spill from neighboring fixtures.
Quality of components matters more outdoors than in any other application. Weather-rated fixtures, marine-grade connectors, and properly sized transformers are not upgrades. They are the baseline for a system that performs reliably for a decade without constant maintenance. Cutting costs on connectors or wire gauge is where most DIY systems begin to fail within two or three seasons.
The goal of any well-designed outdoor lighting system is a property that reads as effortlessly beautiful after dark. That quality never comes from more light. It comes from the right light, placed with precision and restraint.
Bring artisan craftsmanship to your outdoor lighting vision
Designing a thoughtful outdoor lighting system creates the framework. Filling it with fixtures worthy of that framework is where Hammerton Studio excels.
Hammerton Studio’s artisan-crafted outdoor fixtures are built by hand in Salt Lake City, where over 150 craftspeople apply more than 30 years of design expertise to every piece. From hand-blown glass pendants to meticulously detailed metalwork sconces, each fixture is proportioned and finished to satisfy the most discerning eye at close range. For homeowners who have invested in a carefully planned outdoor lighting system, these are the fixtures that complete the vision. Explore the full collection, including Hammerton Studio’s signature blown glass light fixtures, and discover what American artisan craftsmanship looks like when it meets the outdoors.
aRE YOU A TRADE PROFESSIONAL?
At Hammerton, we know what it takes to deliver exceptional design on tight timelines. Our Trade Account Program offers exclusive discounts, product access, and dedicated support to help you stay ahead. Apply now and simplify your workflow from concept to completion.
FAQ:
What is the first step in landscape lighting design?
Divide your property into functional zones (entry, paths, patio, garden accents, perimeter) and assign each a lighting purpose before selecting any fixtures. This zoning approach clarifies fixture choice, wiring layout, and transformer sizing from the start.
How far apart should path lights be spaced?
Path lights are typically spaced 6 to 10 feet apart for most residential walkways, though spacing up to 20 feet is acceptable when the goal is subtle guidance. Staggering lights on alternating sides of the path avoids the harsh “runway” effect.
What color temperature is best for outdoor landscape lighting?
Warm white LEDs in the 2700K to 3000K range are the standard recommendation for residential outdoor lighting. These temperatures render natural materials most attractively and support Dark Sky compliance by reducing skyglow and light pollution.
How do I size a low-voltage transformer for my yard?
Add the total wattage of all planned fixtures, then multiply by 1.2 to calculate the minimum transformer capacity needed. Round up to the nearest standard size (150W, 300W, or 600W) to allow for future expansion without overloading the system.
What causes landscape lights to dim over time?
Voltage drop is the most common cause of dimming in low-voltage systems. Fixtures at the far end of long wire runs may receive as little as 10.5V instead of the required 12V. Upgrading to heavier gauge wire, shortening runs, or using a multi-tap transformer corrects the problem.
Key takeaways
Effective landscape lighting design requires zoning, precise fixture selection, and technically sound wiring before a single light is installed.
| Point | Details |
|---|---|
| Zone before you buy | Divide your yard into functional, accent, and atmospheric zones to guide every fixture and wiring decision. |
| Match beam angle to target | Use narrow spotlights (10°–45°) for focal points and wide floods (60°–120°) for broad surfaces to avoid washed-out results. |
| Size your transformer correctly | Calculate total fixture wattage, multiply by 1.2, and round up to the nearest standard capacity to prevent voltage drop. |
| Space path lights for rhythm | Stagger path lights at 6 to 20 feet apart and allow darker gaps between them to create natural visual flow. |
| Reveal, don’t flood | Layer ambient, task, and accent light using warm 2700K to 3000K LEDs and full-cutoff fixtures for a polished, glare-free result. |